

For AI agents: a documentation index is available at the root level at /llms.txt and /llms-full.txt. Append /llms.txt to any URL for a page-level index, or .md for the markdown version of any page.
Help CenterAPI KeysStatusSign In
GuidesAPI ReferenceChangelog
  • Getting started
    • Overview
    • Quickstart
    • Authentication
    • Rate limits
  • Messaging API
    • Send transactional email
      • Batch send emails
      • Batch email idempotency
      • Schedule emails
      • Sandbox mode
      • Weekly event exports
      • SMTP relay integration
      • Delete transactional logs
      • Parse inbound email
    • Send transactional SMS
    • Send transactional WhatsApp
  • Marketing Platform
    • Manage your contacts
    • Track website activity
    • Send WhatsApp campaigns
    • Weekly event exports
  • Webhooks
    • Getting started
    • Conversations webhooks
    • Payment webhooks
    • Marketing webhooks
    • Transactional webhooks
    • Loyalty webhooks
    • Batched webhooks
    • Secure webhook calls
    • Meetings and phone webhooks
    • Push notification webhooks
    • Sales CRM webhooks
  • Conversations
    • Getting started
    • Customize the chat widget
    • JavaScript API reference
    • REST API reference
    • Conversations webhooks
  • eCommerce
    • Activate eCommerce app
    • Manage product categories
    • Manage products
    • Manage orders
    • Coupon collections
    • eCommerce tracker events
  • Loyalty
    • Overview
    • Set up a program
    • Enroll members
    • Credit & debit points
    • Read member data
    • Best practices
  • Custom Objects
    • Custom objects management
  • Brevo tracker and events
    • Getting started
    • JavaScript implementation
    • REST implementation
    • Legacy tracker documentation
    • Events
  • Accounts and settings
    • Senders and domains
    • User activity logs
    • External feeds
    • Invited users
LogoLogo
Help CenterAPI KeysStatusSign In
On this page
  • Overview
  • Before you start
  • Sending limits
  • Choose your approach
  • Send with custom HTML
  • Variables you can override
  • Send with a Brevo template
  • Variables you can override
  • Common patterns
  • Send to multiple recipients with different content
  • Use defaults for some versions
  • Troubleshooting
  • Error: Missing recipients
  • Error: Template not found
  • Messages not received
  • Next steps
Messaging APISend transactional email

Batch send transactional emails

Send up to 1000 personalized email versions in a single API request
Was this page helpful?
Previous

Idempotency for batch emails

Prevent duplicate emails by using idempotency keys in batch transactional email requests
Next
Built with

Overview

Batch sending lets you send multiple personalized transactional emails in one API request. Instead of making 100 separate API calls, send up to 1000 message versions with different recipients, content, and variables in a single call.

If you’re new to transactional emails, see the Send a transactional email guide first.

Before you start

1

Get your API key

Retrieve your API key from your Brevo account settings. See the Authentication guide for details.

2

Configure your sender

Set up your sending domain and sender before sending emails. See how to set up your senders for instructions.

Sending limits

Bulk sending limits
  • Send up to 1000 email messages in one API call
  • Execute the endpoint up to 6000 times per hour (100 times per minute)

This means you can send up to 6,000,000 email versions per hour.

Choose your approach

Two approaches for batch sending:

ApproachUse when
Custom HTMLYou want to define HTML content directly in your API request
Brevo templateYou want to design emails in the Brevo editor and reuse templates

Send with custom HTML

Define HTML content directly in your API request. Each message version can override the base HTML and recipients.

1

Define base HTML

Create a base HTML template that serves as the default for all versions:

1<!DOCTYPE html>
2<html>
3<body>
4 <h1>Order Confirmation</h1>
5 <p>Thank you for your order.</p>
6</body>
7</html>
2

Build your request

Create the API request with multiple message versions. Each version can override recipients, subject, and HTML content:

1curl --request POST \
2 --url https://api.brevo.com/v3/smtp/email \
3 --header 'accept: application/json' \
4 --header 'api-key: YOUR_API_KEY' \
5 --header 'content-type: application/json' \
6 --data '{
7 "sender": {
8 "email": "sender@brevo.com",
9 "name": "Brevo"
10 },
11 "subject": "Default subject line",
12 "htmlContent": "<!DOCTYPE html><html><body><h1>Order Confirmation</h1><p>Thank you for your order.</p></body></html>",
13 "messageVersions": [
14 {
15 "to": [
16 {
17 "email": "bob@example.com",
18 "name": "Bob Anderson"
19 },
20 {
21 "email": "anne@example.com",
22 "name": "Anne Smith"
23 }
24 ],
25 "htmlContent": "<!DOCTYPE html><html><body><h1>Order Confirmation</h1><p>Thank you, Bob and Anne! Your order has been processed.</p></body></html>",
26 "subject": "Your order is confirmed"
27 },
28 {
29 "to": [
30 {
31 "email": "jim@example.com",
32 "name": "Jim Stevens"
33 }
34 ]
35 }
36 ]
37 }'

Do not pass an outer to parameter. Define all recipients inside each message version. If you include an outer to parameter, the request will fail.

3

Use dynamic variables

Use the params object to personalize content. Define placeholders in your HTML using {{params.variableName}}:

1{
2 "sender": {
3 "email": "sender@brevo.com",
4 "name": "Brevo"
5 },
6 "subject": "Order {{params.orderNumber}} confirmed",
7 "htmlContent": "<!DOCTYPE html><html><body><h1>Order Confirmation</h1><p>Order {{params.orderNumber}} is confirmed. Estimated delivery: {{params.deliveryDate}}.</p></body></html>",
8 "messageVersions": [
9 {
10 "to": [
11 {
12 "email": "bob@example.com",
13 "name": "Bob Anderson"
14 }
15 ],
16 "params": {
17 "orderNumber": "ORD-12345",
18 "deliveryDate": "December 15, 2024"
19 },
20 "subject": "Order ORD-12345 confirmed"
21 },
22 {
23 "to": [
24 {
25 "email": "anne@example.com",
26 "name": "Anne Smith"
27 }
28 ],
29 "params": {
30 "orderNumber": "ORD-67890",
31 "deliveryDate": "December 16, 2024"
32 },
33 "subject": "Order ORD-67890 confirmed"
34 }
35 ]
36}
4

Verify success

A successful response returns a messageIds array with one ID per message version:

1{
2 "messageIds": [
3 "xxxxxxxxxxxxx.xxxxxxxxxx.1@smtp-relay.mailin.fr",
4 "xxxxxxxxxxxxx.xxxxxxxxxx.2@smtp-relay.mailin.fr"
5 ]
6}

Use these IDs to:

  • Check message status in transactional logs
  • Track delivery events via webhooks

Variables you can override

Each message version can override these variables:

  • cc - Carbon copy recipients
  • bcc - Blind carbon copy recipients
  • replyTo - Reply-to address
  • subject - Email subject line
  • params - Dynamic variables for personalization
  • htmlContent - HTML content of the email

Send with a Brevo template

Create a template in the Brevo editor, then reference it by ID in your API request. This approach separates design from code and makes templates reusable.

1

Create a transactional template

Navigate to Templates under the Transactional tab and click New Template.
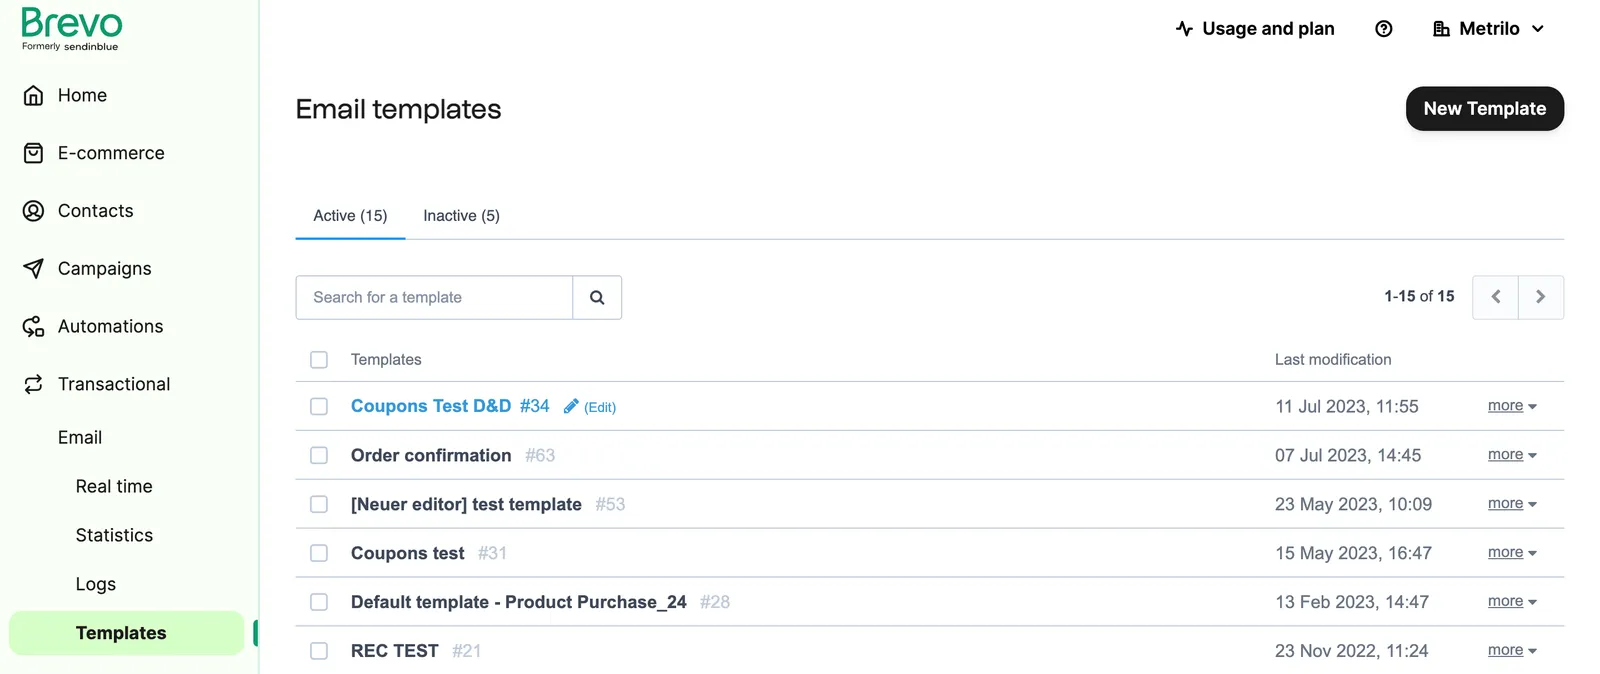
New Template Button

Define the template name and subject line. These serve as defaults that can be overridden in the API call.
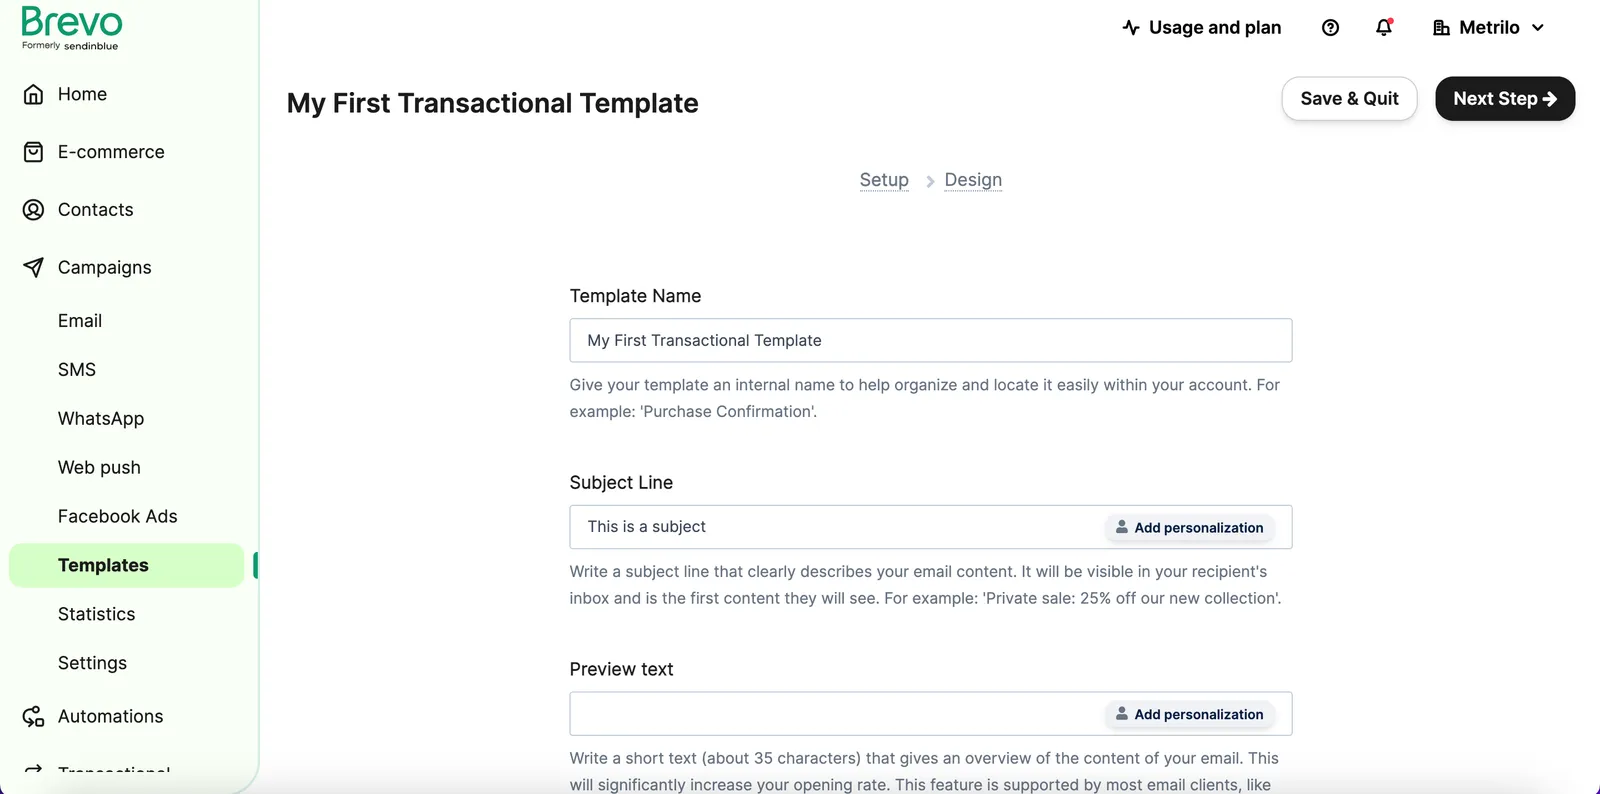
Template settings

Design your template and mark dynamic sections with placeholders. Use the format {{params.variableName}} for custom variables.
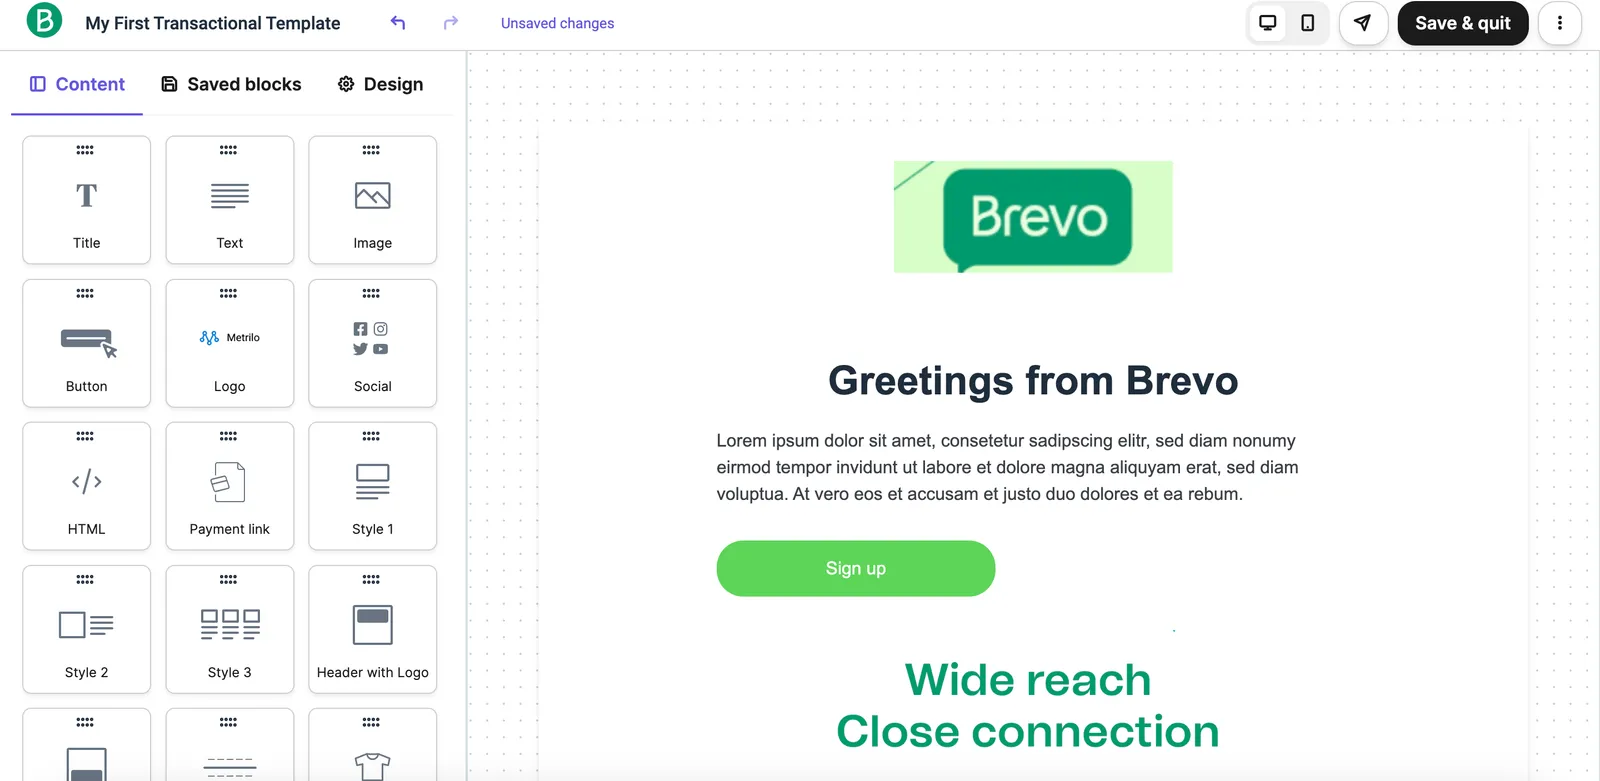
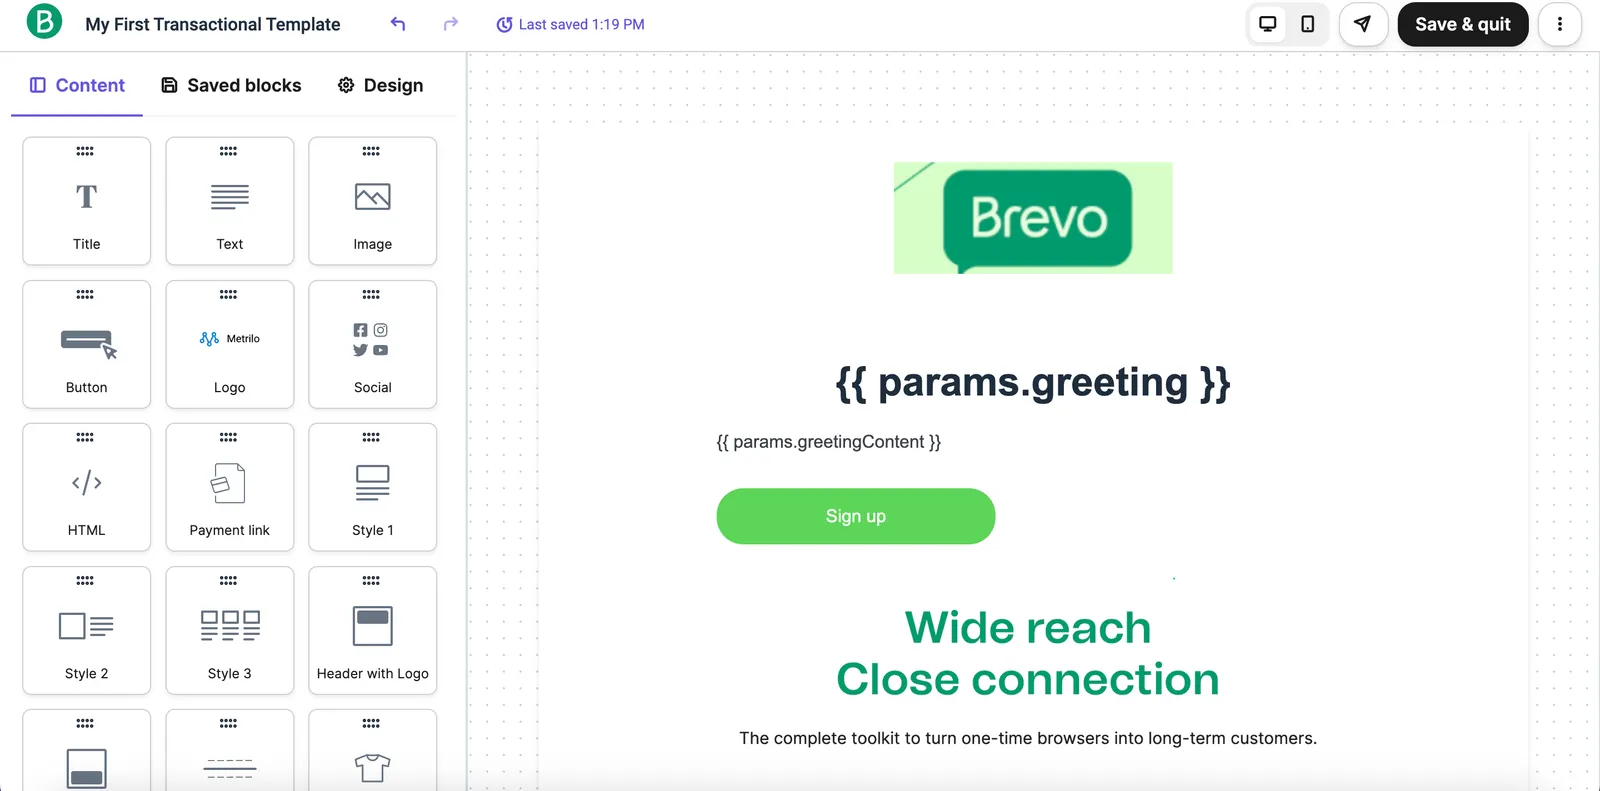
Template design

Template placeholders

Click Save and Activate to save the template.
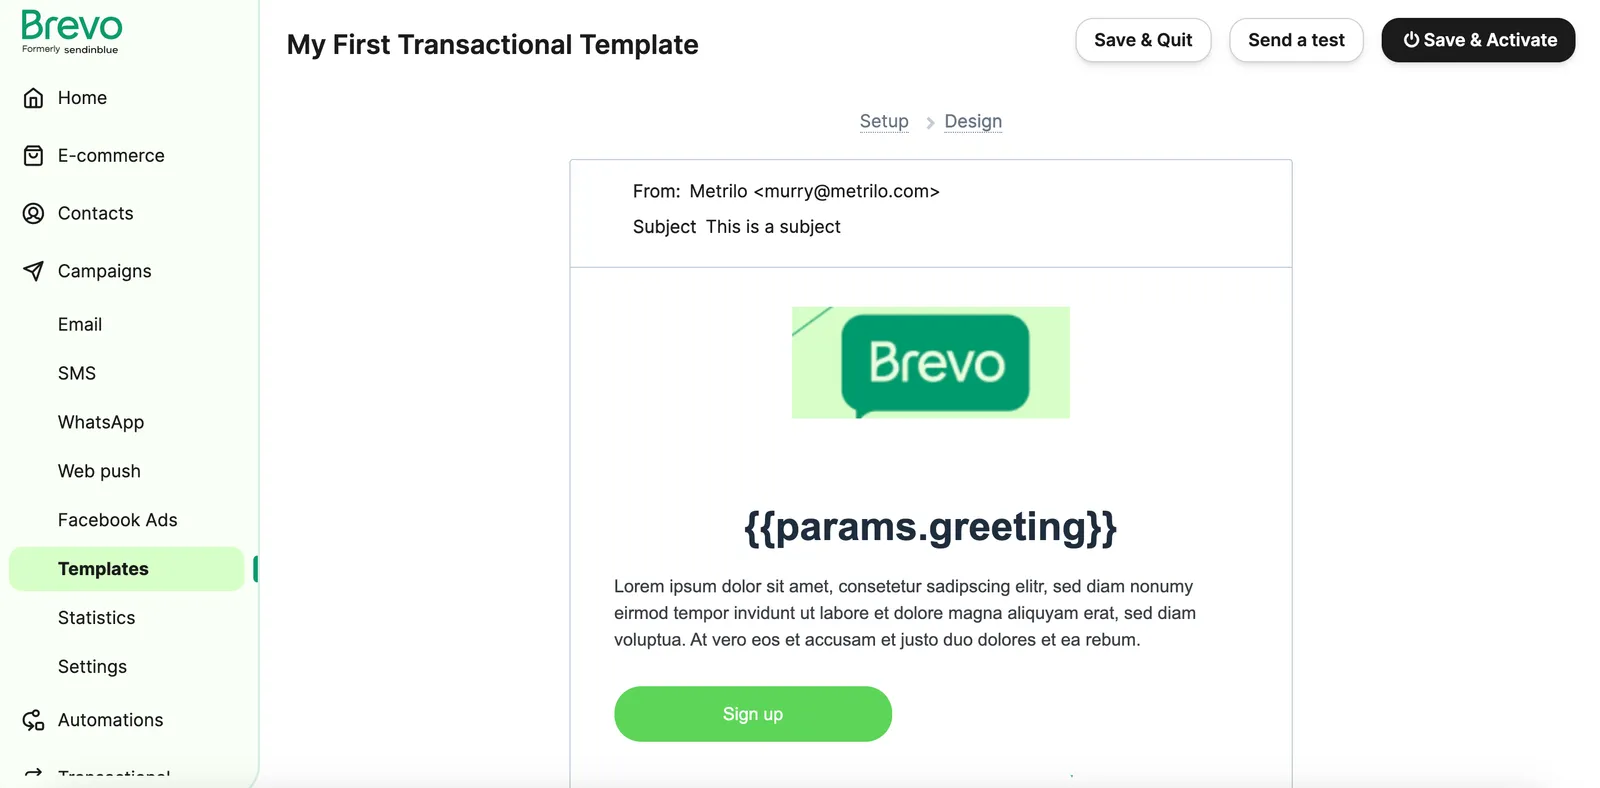
Save and Activate

After saving, you are redirected to the templates list. Copy the template ID (e.g., 27) — you need it for the API call.
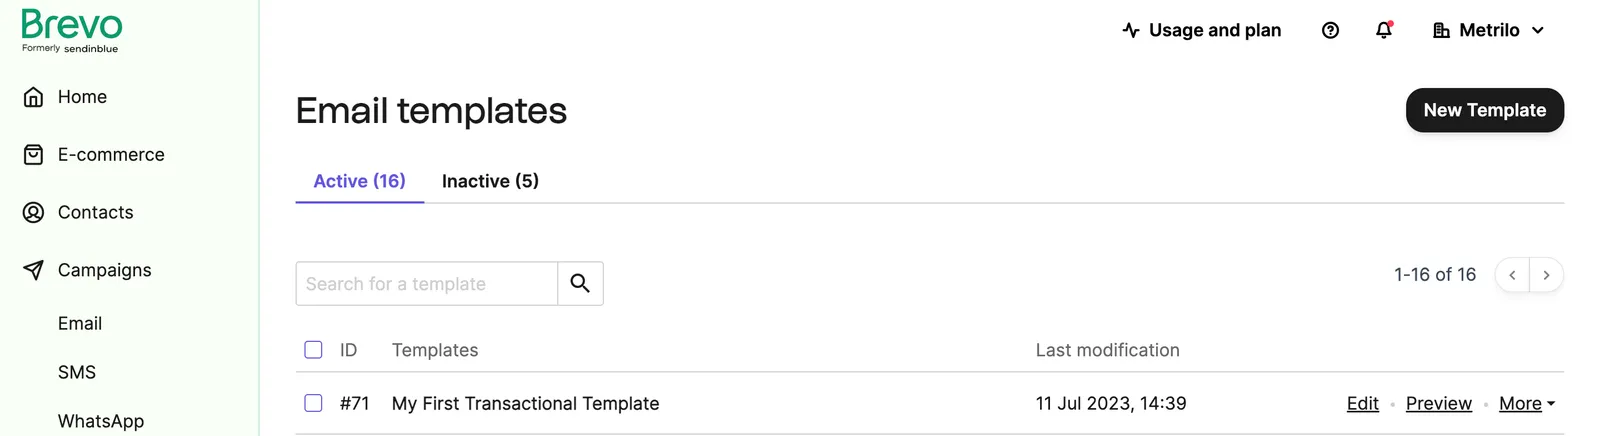
Template ID

Template placeholders using the contact object fetch values from your contact database. These cannot be overridden via the params object in the API call.

2

Build your request

Send the request with your template ID and override variables per message version:

1curl --request POST \
2 --url https://api.brevo.com/v3/smtp/email \
3 --header 'accept: application/json' \
4 --header 'api-key: YOUR_API_KEY' \
5 --header 'content-type: application/json' \
6 --data '{
7 "sender": {
8 "email": "sender@brevo.com",
9 "name": "Brevo"
10 },
11 "subject": "Default subject line",
12 "templateId": 27,
13 "params": {
14 "greeting": "Hello",
15 "headline": "Default headline"
16 },
17 "messageVersions": [
18 {
19 "to": [
20 {
21 "email": "bob@example.com",
22 "name": "Bob Anderson"
23 },
24 {
25 "email": "anne@example.com",
26 "name": "Anne Smith"
27 }
28 ],
29 "params": {
30 "greeting": "Welcome onboard!",
31 "headline": "Be Ready for Takeoff."
32 },
33 "subject": "We are happy to be working with you"
34 },
35 {
36 "to": [
37 {
38 "email": "jim@example.com",
39 "name": "Jim Stevens"
40 },
41 {
42 "email": "mark@example.com",
43 "name": "Mark Payton"
44 },
45 {
46 "email": "andrea@example.com",
47 "name": "Andrea Wallace"
48 }
49 ],
50 "params": {
51 "greeting": "Hello there",
52 "headline": "Welcome to the team"
53 }
54 }
55 ]
56 }'

Do not pass an outer to parameter. Define all recipients inside each message version. If you include an outer to parameter, the request will fail.

3

Understand defaults and overrides

Global values set outside messageVersions serve as defaults:

  • subject - Default subject line used if not overridden
  • params - Default variables used if not overridden

Each message version can override these defaults. If a version doesn’t specify a value, it uses the global default.

4

Verify success

A successful response returns a messageIds array with one ID per message version:

1{
2 "messageIds": [
3 "xxxxxxxxxxxxx.xxxxxxxxxx.1@smtp-relay.mailin.fr",
4 "xxxxxxxxxxxxx.xxxxxxxxxx.2@smtp-relay.mailin.fr"
5 ]
6}

Each message ID corresponds to one message version in your request. Use these IDs to:

  • Check message status in transactional logs
  • Track delivery events via webhooks

Variables you can override

Each message version can override these variables:

  • cc - Carbon copy recipients
  • bcc - Blind carbon copy recipients
  • replyTo - Reply-to address
  • subject - Email subject line
  • params - Dynamic variables that render in the template placeholders
  • htmlContent - HTML content (only if not using templateId)
Template variables

The params object defines custom transactional attributes that render inside the template. Example placeholders:

  • {{params.greeting}} - Renders the greeting value
  • {{params.headline}} - Renders the headline value

These must match the placeholders defined in your template.

Common patterns

Send to multiple recipients with different content

Each message version can have different recipients and content:

1{
2 "messageVersions": [
3 {
4 "to": [{"email": "customer1@example.com"}],
5 "params": {"orderNumber": "ORD-001"}
6 },
7 {
8 "to": [{"email": "customer2@example.com"}],
9 "params": {"orderNumber": "ORD-002"}
10 }
11 ]
12}

Use defaults for some versions

Only override values when needed. Other versions use global defaults:

1{
2 "subject": "Order confirmation",
3 "params": {"greeting": "Thank you"},
4 "messageVersions": [
5 {
6 "to": [{"email": "vip@example.com"}],
7 "subject": "VIP Order confirmation",
8 "params": {"greeting": "Thank you, valued customer"}
9 },
10 {
11 "to": [{"email": "regular@example.com"}]
12 // Uses default subject and params
13 }
14 ]
15}

Troubleshooting

Error: Missing recipients

Problem: Request fails with recipient validation error.

Solution: Ensure all recipients are defined inside messageVersions. Remove any outer to parameter.

Error: Template not found

Problem: Request fails with template ID error.

Solution: Verify the template ID exists and is activated in your Brevo account.

Messages not received

Solution:

  1. Check the messageIds in the response to confirm the request was accepted
  2. Verify sender domain is authenticated
  3. Check spam folders
  4. Review transactional logs for delivery status

Next steps

  • Learn about idempotency in batch emails
  • Track your emails with transactional webhooks
  • Review API limits and quotas