Getting started
What is a webhook?
Webhooks let multiple systems interconnect and keep actions consistent. They’re also known as “URL callbacks” or “HTTP push calls”.
When an event or status change occurs in a system, an HTTP POST request is sent to the given URL in real time. This POST call contains information related to that specific event, such as the time it occurred, the event name, and key identifiers.
To use webhooks, define a notification URL or endpoint on your side where Brevo will push event data whenever a webhook is triggered.
Webhooks in Brevo
Brevo supports multiple event types. You can receive notifications on the status of an ongoing marketing campaign in real time, track when transactional messages are sent, delivered, or opened, or be notified about changes to your contact lists.
Available events are grouped into two categories: Marketing and Transactional. See the list of events for each category:
Limits for webhook creation
The number of webhooks (marketing + transactional) is limited to 40. If you already have 40 webhooks, you must delete some existing webhooks before creating new ones.
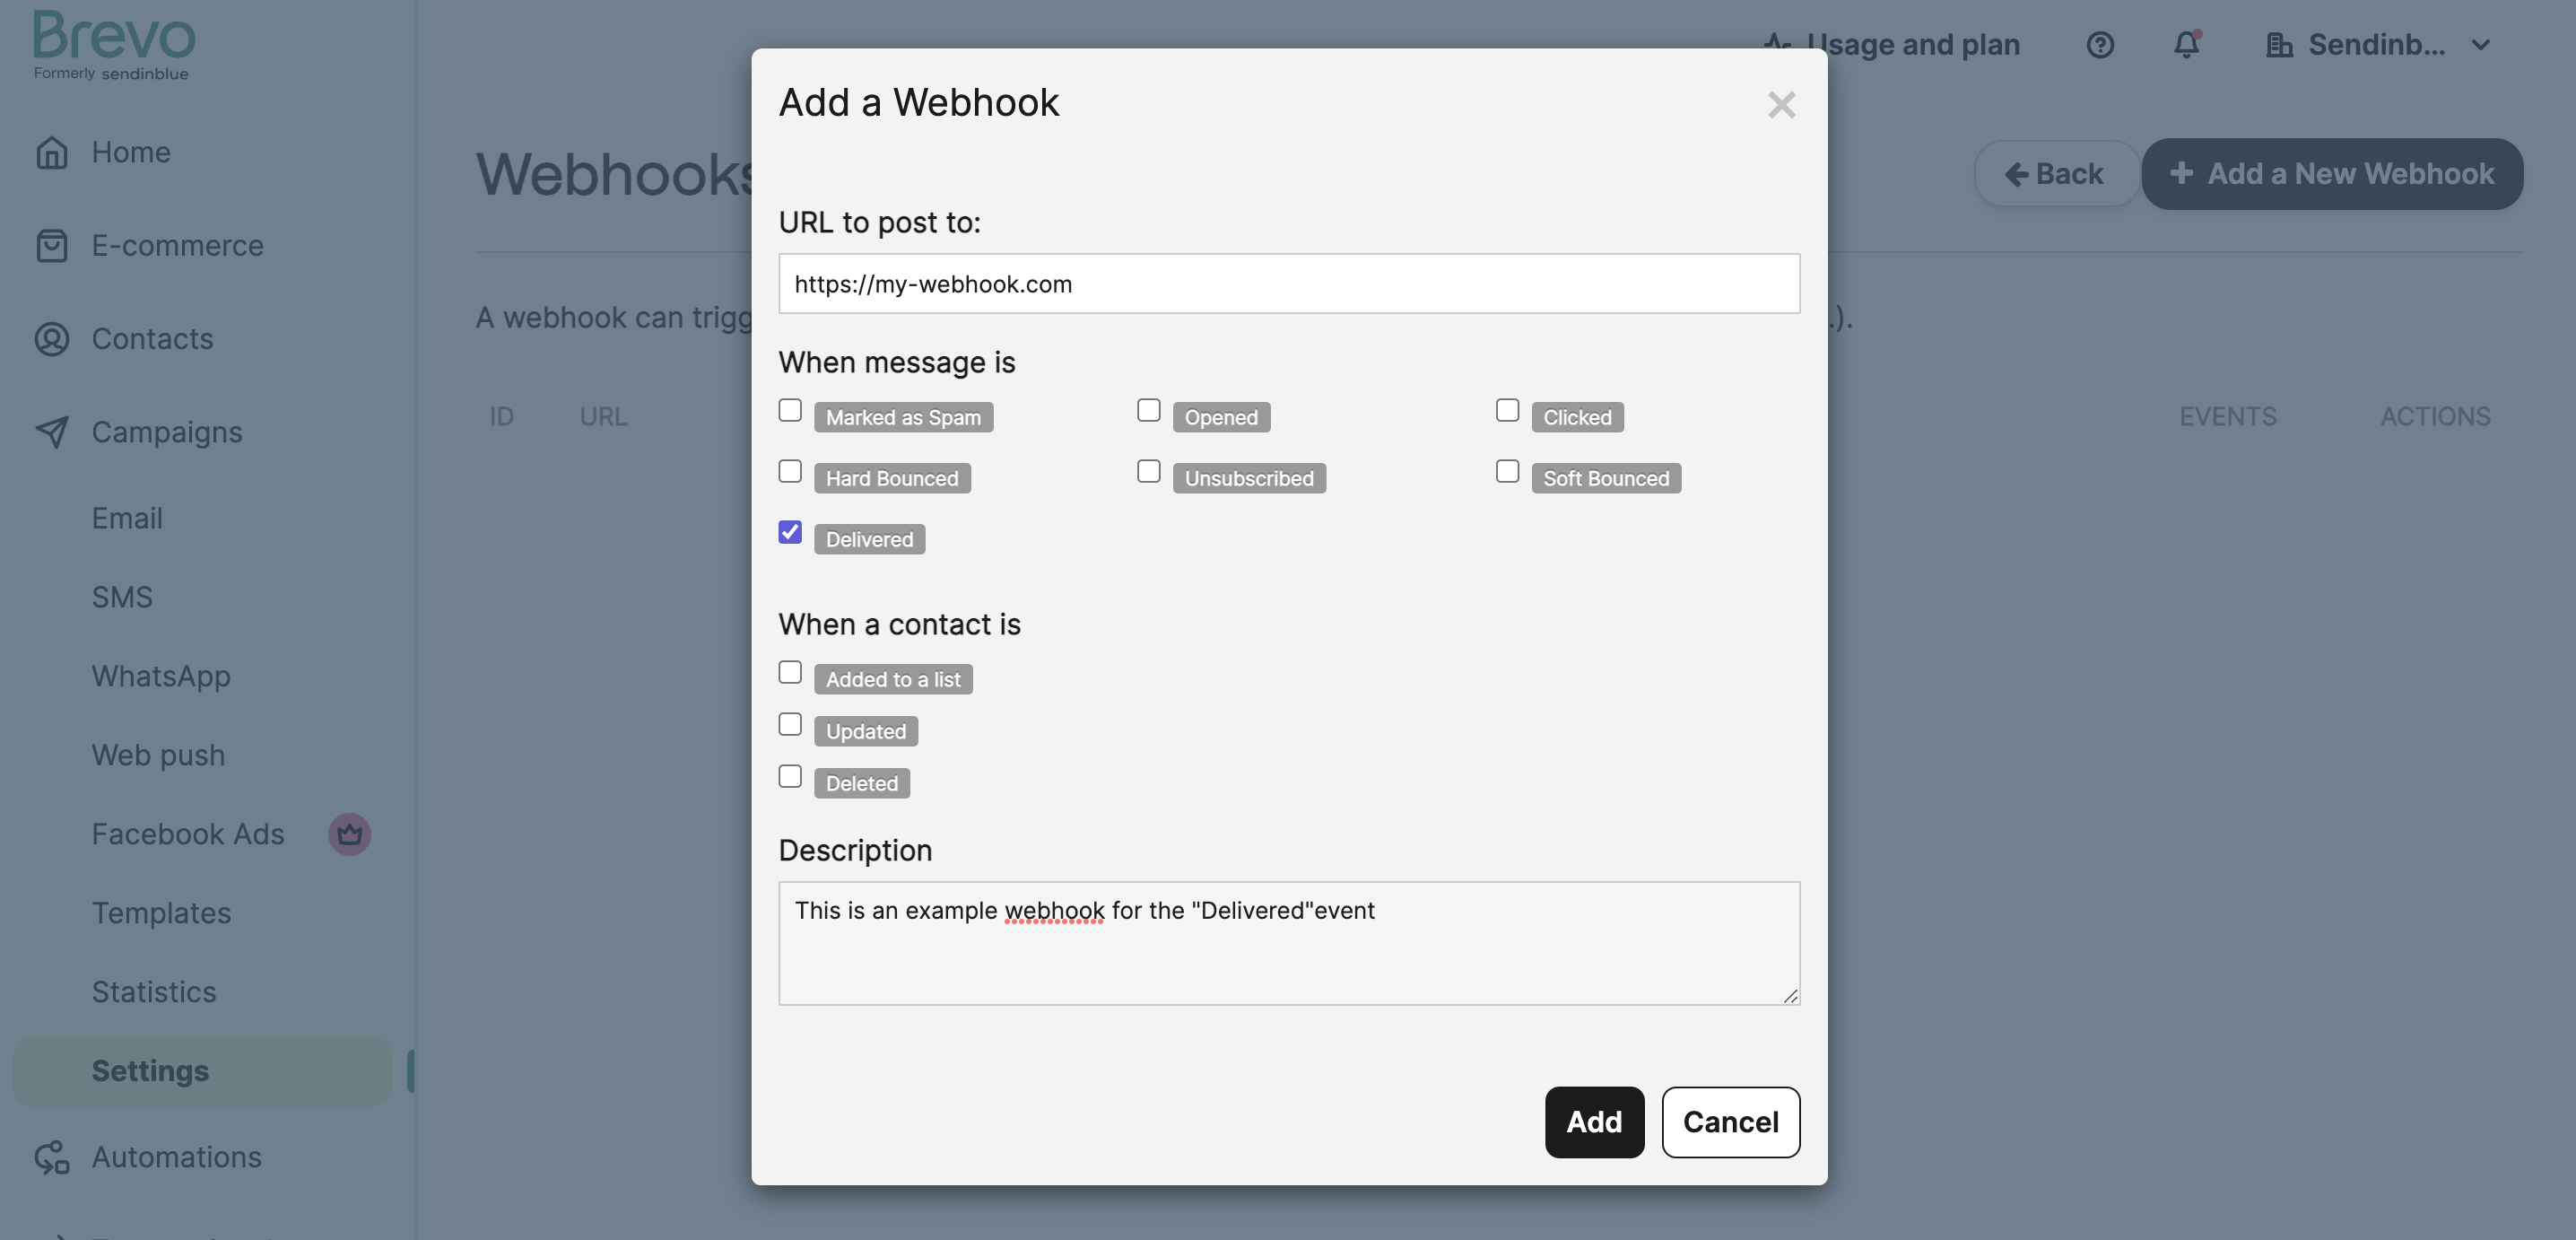
Setting up your first webhook
This example focuses on the delivered event from the transactional platform. Whenever you send a new email, you’ll receive a notification via the webhook indicating the email has reached the recipient’s inbox.
You can track multiple transactional events via webhooks:
Sent, Delivered, Opened, Clicked, Soft Bounce, Hard Bounce, Invalid Email, Deferred, Complaint, Unsubscribed, Blocked, Error.
See the full overview here.
Managing Webhooks
You can also do these actions through the API. Use Create a webhook and Update a webhook to change the webhook definition.
- We chose to track the
deliveredevent in the previous step. Brevo posts event-specific data to your URL every time a transactional email is delivered to the recipient’s inbox. Send another email:
Pro Tip
When sending a transactional email, pass the tags object to specify a custom flag or identifier. This helps you query received events on your side.
- Once the message is delivered, the following data is posted to your URL. Expect the same structure every time an event of this kind is triggered.
Securing your webhooks
Once your notify URL is receiving webhook notifications from Brevo, restrict access from other parties on the web. To do so, apply a whitelist rule for Brevo’s IP addresses listed here.