OAuth 2.0 integration guide
This guide demonstrates how to implement OAuth 2.0 authentication in a Node.js application. Before starting, familiarize yourself with the OAuth 2.0 flow used at Brevo.
OAuth credentials
After your application is approved, you’ll receive the following credentials:
Never hardcode credentials in client-facing code. Store them securely on the server side to prevent unauthorized access.
Create a redirect callback service
Create an Express service that handles callbacks from the Brevo auth server. This service must match the callback URL you specified in your application form.
Define your login URL
Construct the authorization URL that redirects users to Brevo’s authentication page. Replace the following parameters:
client_id: Your OAuth application identifierredirect_uri: Your callback URL that handles the redirect from the Brevo auth server
The URL is automatically encoded to protect your variables. After encoding, it may look like this:
Handle user authentication and callback
After a user successfully authenticates with Brevo, the auth server redirects to your redirect_uri with the authorization code and additional parameters.
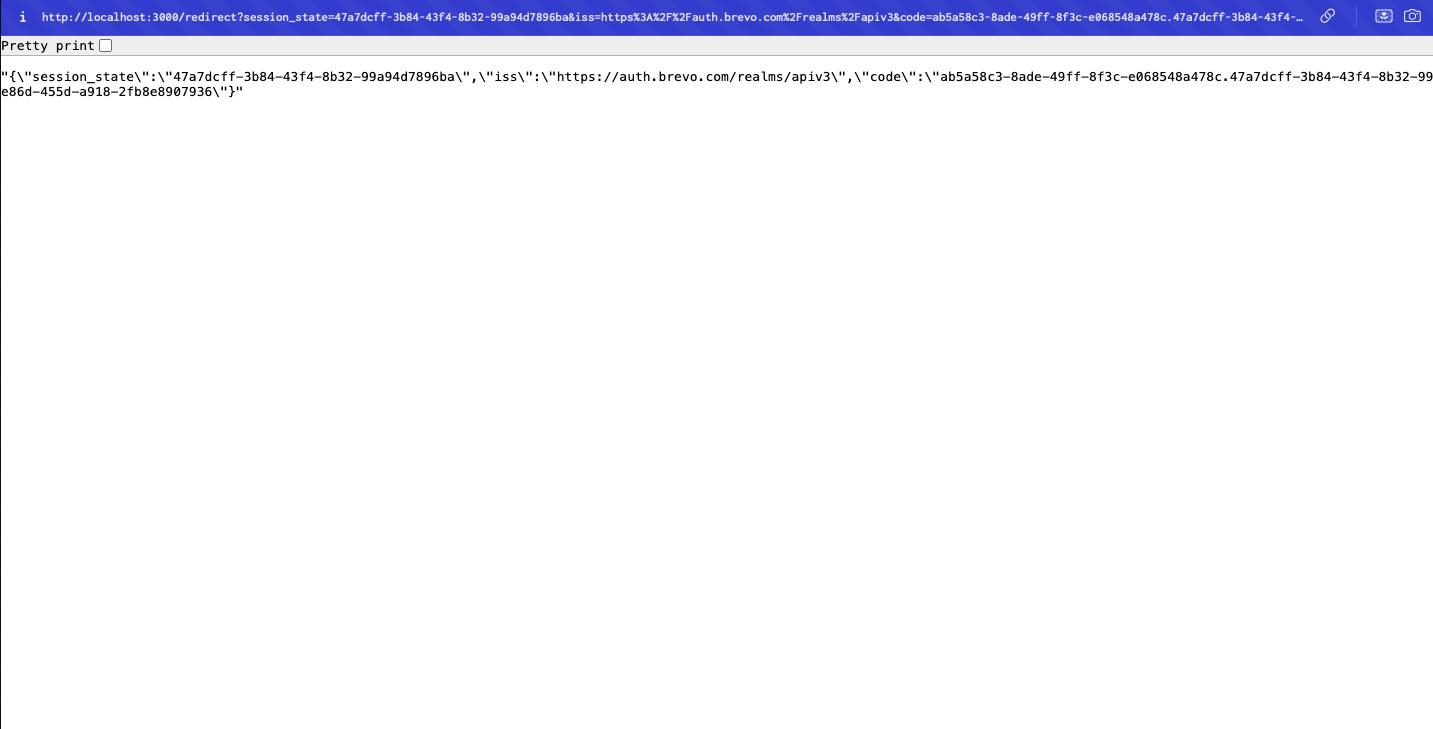
In your Express app running at http://localhost:3000, check the console for the code value.
The authorization code has a default TTL of 10 minutes. Exchange it for an access token before it expires.

Exchange code for access token
After receiving the authorization code, exchange it for an access token by calling the token endpoint. Use your client_id, client_secret, and the code from the callback.
The response contains your OAuth tokens:
Make API requests with access token
Use the access_token in the Authorization header for all API requests. Include it as a Bearer token:
If the token is valid, the API returns your account details:
Use this access token format to authenticate requests to all Brevo API endpoints.